Create a Chatbot
This guide walks you through creating your first WhatsApp chatbot in Wylto — from opening the Bot Builder to connecting your first blocks.
Prerequisites
Section titled “Prerequisites”- A Wylto account with an active app and connected WhatsApp Business number
- Access to the Bot Builder section (under Whatsapp in the left sidebar)
1. Open the Bot Builder
Section titled “1. Open the Bot Builder”From the left sidebar, go to Whatsapp → Bot Builder. This is where all of your chatbot flows live.

Each row is a separate flow. You can open an existing flow to edit it, or click Create New in the top right to start a new one.
2. Create a new flow
Section titled “2. Create a new flow”Click Create New. A dialog opens with two things to decide:
- A name for your flow (e.g. “Lead Qualification”, “Appointment Booking”)
- A template to start from
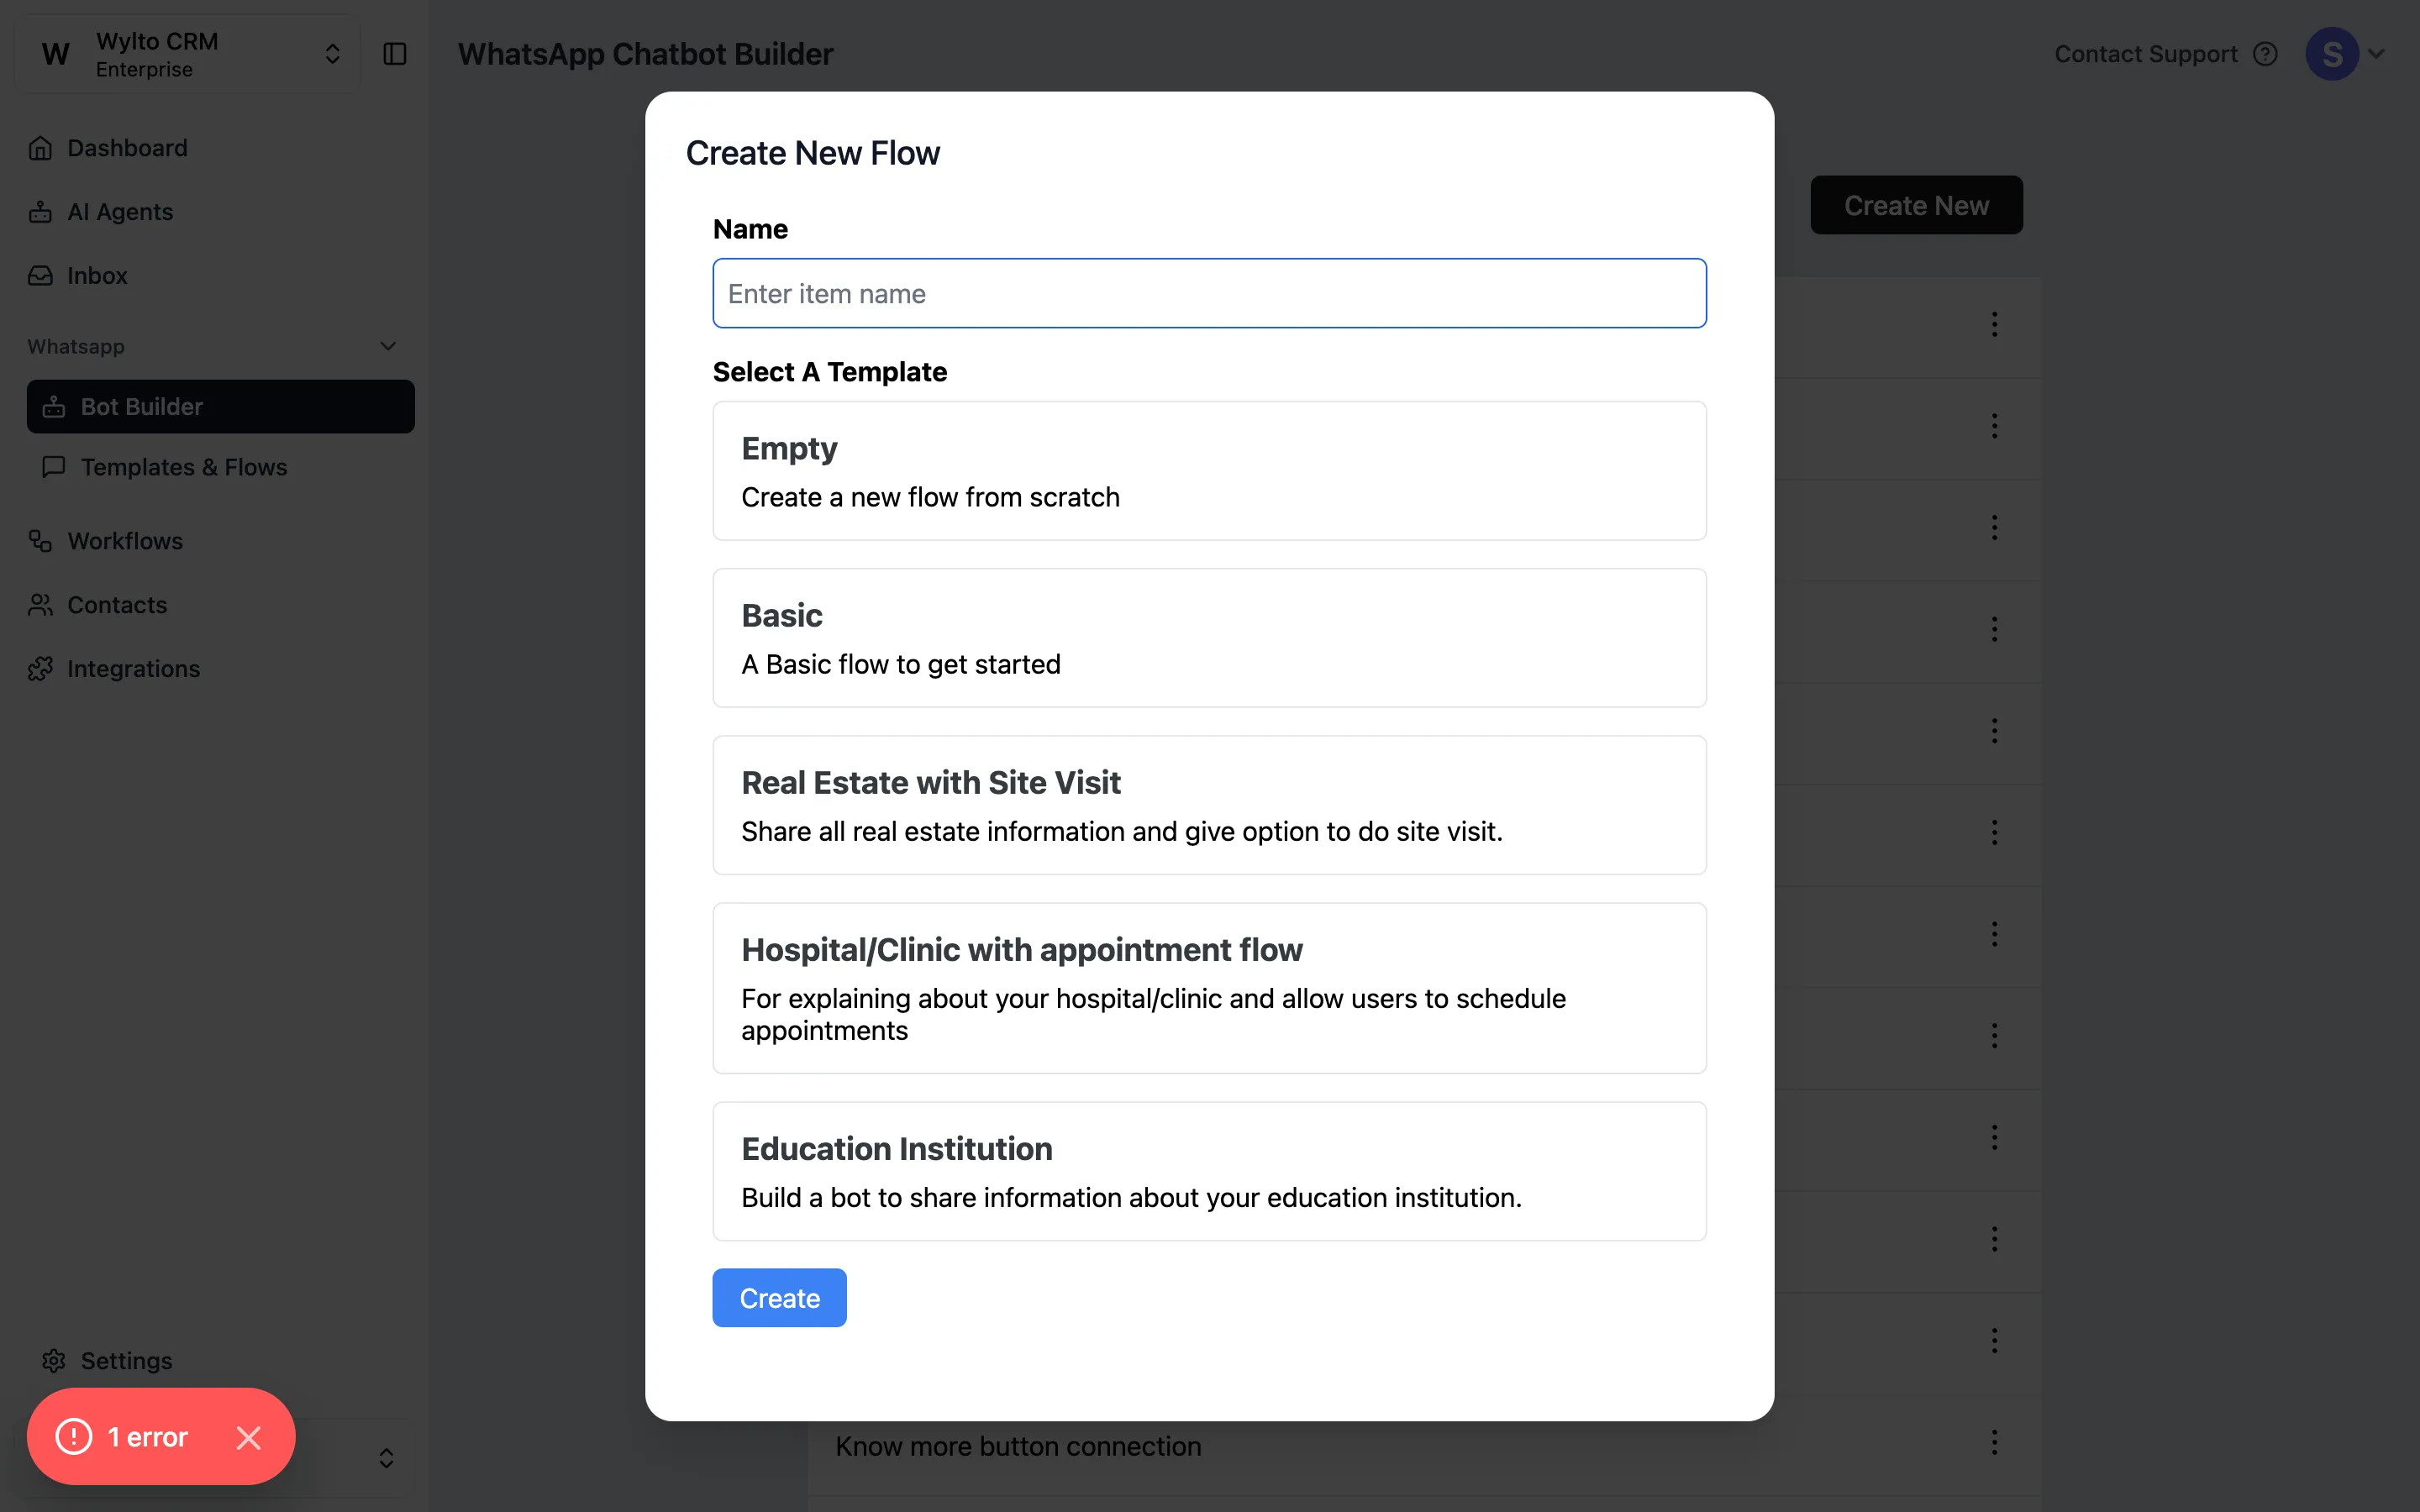
Wylto ships with ready-made templates for common use cases:
| Template | Good for |
|---|---|
| Empty | Starting from a blank canvas |
| Basic | A minimal flow to get started quickly |
| Real Estate with Site Visit | Sharing property info and booking site visits |
| Hospital/Clinic with appointment flow | Explaining services and scheduling appointments |
| Education Institution | Sharing program info for schools and institutes |
Enter a name, select a template, and click Create. You’ll be taken straight into the visual editor.
3. Build the flow in the editor
Section titled “3. Build the flow in the editor”The editor is a visual canvas where you connect blocks to define the conversation. Every flow starts at the Flow Starts here marker and runs left to right along the connections you draw.

Anatomy of the editor
Section titled “Anatomy of the editor”- Canvas — the main area where blocks live. Drag blocks to rearrange them; drag from a block’s right-side dot to another block’s left-side dot to connect them.
- Add New Block (top right) — opens the block picker.
- Zoom and fit controls (bottom left) — zoom in, zoom out, fit to screen, and lock/unlock the canvas.
- Minimap (bottom right) — a thumbnail of the whole flow; useful for large bots.
- Saved indicator (top right) — Wylto auto-saves as you edit.
- Back arrow (top left) — returns to the Bot Builder list.
Block types
Section titled “Block types”Click Add New Block to open the picker. The available blocks are:
- Send a Message — plain text, media, or interactive messages with buttons
- Ask a Question — collect a response from the customer and store it
- Update Contact — write collected details back to the contact record
- Connect to Flow — jump into another flow (useful for reusable sub-flows)
- WhatsApp Flow — trigger a native WhatsApp Flow form
- Send Catalog — share products from your connected Meta catalog
- Condition — branch the path based on a variable or customer response
- Delay — wait a fixed amount of time before the next block
- HTTP Request — call an external API (e.g. your CRM)
- Start Live Chat — hand the conversation to a human agent
- Add to Segment / Remove from Segment — tag the contact for later targeting
- Remove Tag — remove a previously applied tag
- Conversion API — send a conversion event (e.g. to Meta Ads)
Connect blocks
Section titled “Connect blocks”Each block has a green dot on the left (input) and a black dot on the right (output). Click and drag from an output to an input to draw a connection. The Flow Starts here label points to whichever block is your entry point.
4. Save and test
Section titled “4. Save and test”The editor auto-saves — look for the Saved badge in the top right.
To test the bot end-to-end, send a message to your connected WhatsApp number that matches your trigger. You can also configure a test keyword in your flow settings so only you receive the in-progress version while you iterate.
Next steps
Section titled “Next steps”- Configure triggers — decide which keywords or events start this flow. See WhatsApp Bot Builder for the full list of settings.
- Use variables — personalize messages with
{{contact.name}}and custom variables collected via Ask a Question blocks. - Combine with Workflows — trigger a flow from an automated workflow (e.g. after a lead is captured via Facebook Lead Ads). See Workflows.